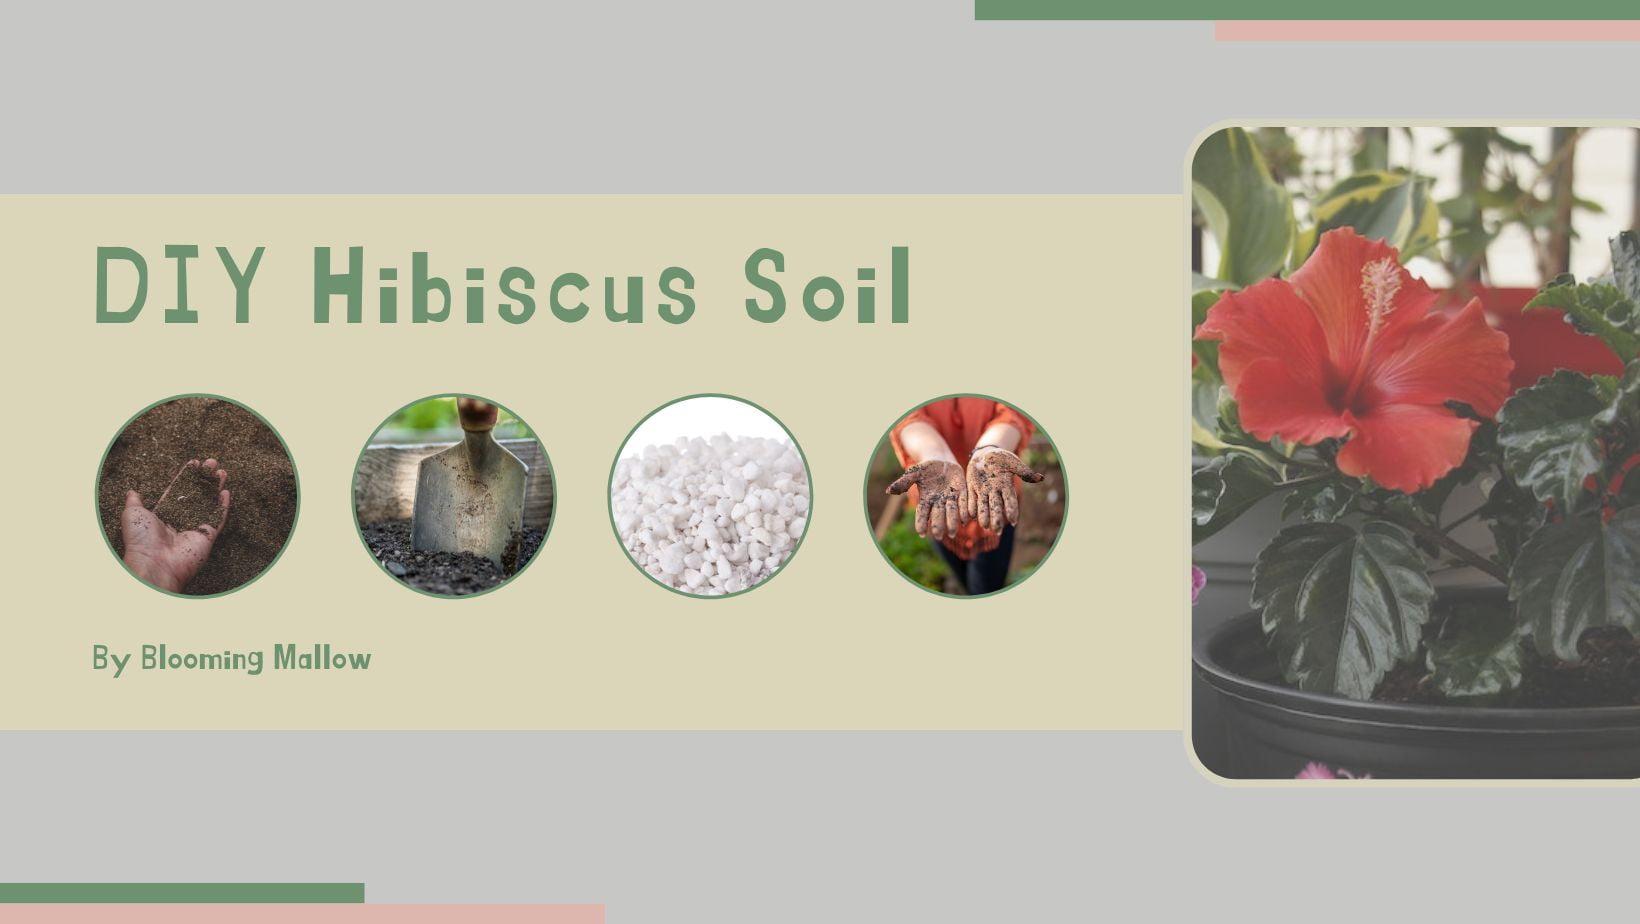

One of the most important factors that affect the growth and health of hibiscus plants is the type of soil they are grown in.
And what better way to ensure the perfect soil composition than making it yourself at home? Not only is it more economical, but it can also be a fun and fulfilling experience.
In this article, I will guide you through the process of preparing the ideal soil for your hibiscus plants, so you can watch them grow and bloom to their full potential.
So, let’s get our hands dirty and dive into the world of soil composition!
What Type Of Soil Is Best For Hibiscus?
Hibiscus are native to the warm temperatures of tropical and subtropical regions. To thrive, they prefer a light soil that stays moist yet allows adequate aeration of the roots.
So even if you are not living around the tropics, you need to make sure that the soil you are using exhibits these characteristics. A well-drained, slightly acidic soil with a pH between 5.5 and 7 provides the best result for Hibiscus plants.
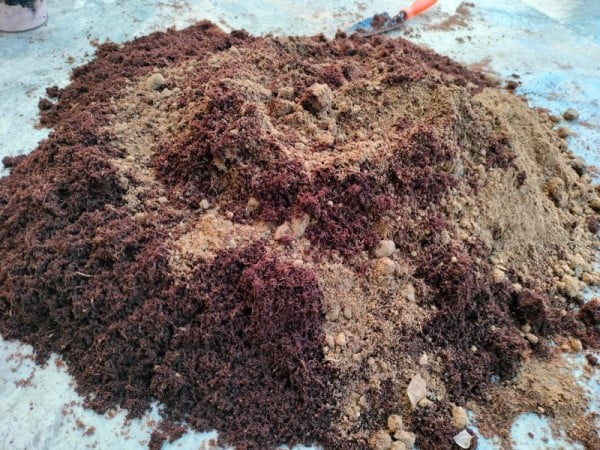
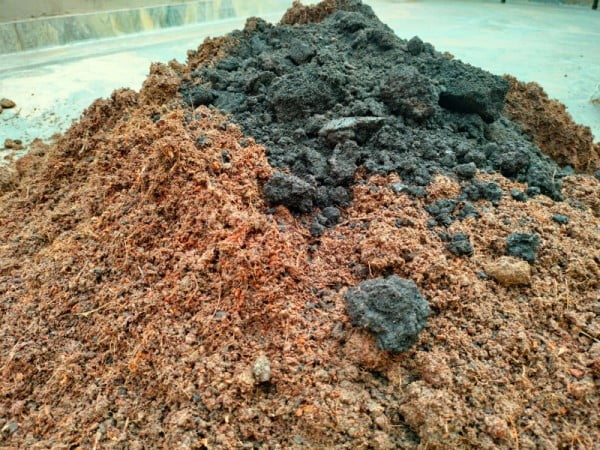
I have personally tested growing hibiscus plants in different soil types (red clay soil, black soil, loamy soil, and sandy soil) and have had the best results with black/brown soil that is mixed with organic matter and coco peat. This is because porous soil allows better root development as well as efficient water and nutrient uptake.
A thick clay soil can also give the same results provided it is mixed with perlite or vermiculite along with coco peat and organic matters such as vermicompost and aged manure.
However, clay soil alone will not be beneficial to hibiscus.
And in case you are planting hibiscus in your garden, it doesn’t matter what kind of soil you grow it in, you can always improve it by adding the above ingredients. Doing this will increase the porosity as well as add valuable nutrients to the soil essential for the growth of the plant.
Keep on reading below to learn how you can achieve this.
Ideal Soil Composition For Hibiscus Plants
As already outlined, Hibiscus plants thrive in well-drained, nutrient-rich and slightly acidic soils that maintains a pH between 5.5 and 7. Soil that is too alkaline can create nutrient deficiencies while a highly acidic one can damage the roots and hinder the uptake of nutrients.
So, in order to prepare the ideal soil for hibiscus plants, you need to make sure that the potting soil is fairly light in weight with adequate aeration. This prevents water from accumulating around the roots and causing rot.
Listed below are some of the essential elements of an ideal soil mix for hibiscus plants:
Organic matter
The first and most important element that creates an ideal Hibiscus soil is organic matter. In fact, organic matter is important not just for Hibiscus but for any indoor or outdoor plant you can possibly think of.
By adding organic matter, you provide the soil with all the essential nutrients that help improve soil structure while making it more fertile in the process.
And while you can buy this ingredient quite easily from any gardening store, you can also make this ingredient at home by composting vegetable waste, grass clippings, and leaves.
Livestock manure is another form of organic matter that is an excellent source of nutrients and can be incorporated into the soil. However, it is important to use well-aged manure that has been composted for at least six months. This is because fresh manure is usually high in nitrogen, which can burn plants and damage their root system.
Coco peat
Hibiscus plants can greatly benefit from the addition of coco peat in their soil mix. This organic and renewable material is derived from processed and dried coconut husks. Having exceptional water retention and aeration properties, research indicates that cocopeat in combination with vermicompost and organic manure can serve as an excellent soil substitute for modern agricultural practices.
Note: As an alternative, Peat moss is also a good source of organic matter and can help improve soil structure. However, peat moss is a non-renewable resource and can be expensive. So, you can use either coco peat or peat moss depending on the availability around your region.
Perlite or vermiculite
The third ingredient to prepare hibiscus soil can either be perlite or vermiculite. Both are lightweight materials that help improve soil structure by making it less compact.
While perlite is made from volcanic glass, vermiculite is made from mica and is available in different qualities. However, I would only recommend adding them in case you are working on clay soil. For any other soil type, you can skip buying them altogether.
Neem powder
The last essential, which is completely optional but highly recommended, is neem powder. This powder is made from the leaves of Azadirachta indica and acts as a natural soil conditioner. It helps improve soil structure by increasing water retention and reducing soil compaction.
More importantly, it controls soil-borne fungal diseases, such as powdery mildew, by inhibiting the growth of the fungus (quite common in Hibiscus plants).
Step-By-Step Guide To Prepare Your Own Hibiscus Soil Mix
Step 1: Source the materials
To make your own hibiscus soil, you will need to gather the following materials:
- Garden soil
- Coco peat / peat moss
- Perlite or vermiculite
- Aged manure
- Vermicompost
- Neem powder
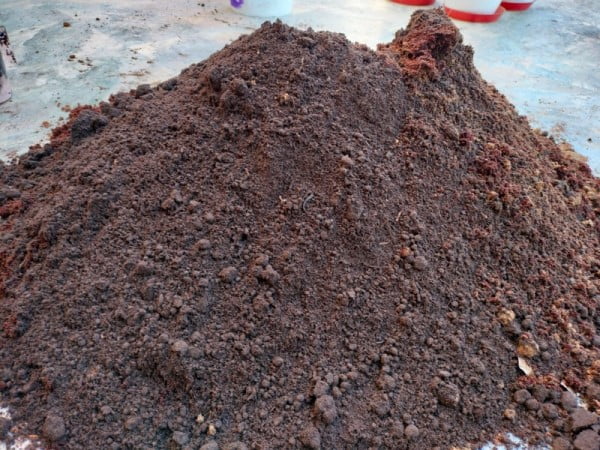
Step 2: Mix the materials
The second step in preparing your hibiscus soil is to mix all the ingredients together. Here is the recommendation to prepare a perfect mix:
- 2 parts cocopeat (pre-moistened)
- 2 parts garden soil
- 1 part vermicompost
- 1 part manure
- 0.20 parts perlite (to amend clay soil)
Measure the ingredients and mix them thoroughly using a trowel. Be sure to wear a mask if you are handling perlite as it is dusty and can cause respiratory problems.
Step 3: Add neem powder
While it is completely optional, you can sprinkle some neem powder to the prepared soil mixture. If you are unsure of the amount to use, as a general guideline you can add 5-10 grams of neem powder for a 10–12-inch pot.
Adding this organic ingredient to the soil mix can help reduce the risk of soil-borne diseases and pest infestations. It also promotes root development and nutrient uptake of Hibiscus plants.
Step 4: Water the soil
After you have mixed all the components together, it is time to hydrate the soil mixture. Use a watering can or hose and moisten the soil mixture. Now using your trowel, mix the soil again thoroughly.
Step 5: Adjust pH
Once all the ingredients are bonded together, it is time to check the pH level of the soil mix. In order to determine the acidity or alkalinity of a soil, use a pH testing kit on a sample of your soil mix.
If the pH is too low (strongly acidic): Add lime to the soil to raise its pH. Here, dolomite lime can be used as it also contains magnesium.
If the pH is too high (alkaline): Add sulfur to the soil to lower its pH. You can use elemental sulfur here (cheapest way) to lower the pH level of the soil. Alternatively, you can add some diluted vinegar to the hibiscus soil.
Now mix the additive into the soil and ensure that the mixture is thoroughly and evenly worked into the soil.
Note: Skip this part if the soil pH is between 5.5 and 7.
Step 6: Allow to rest
Leave the soil mixture to rest for few days. Test the soil pH again after 1 week to see if the soil has attained the desired pH level.
Step 7: Plant your hibiscus
Once everything is in order, you can plant your hibiscus. Pour the prepared mixture into the pot and make a small hole slightly larger than the root ball of your plant.
Now carefully remove the plant from its container and place it in the hole. Fill the remaining gap with the soil mixture, but be careful not to bury the stem too deeply. Once done, water the plant thoroughly.
Homemade Potting Soil Mix vs. Premade Potting Mix: Which is Better?
While growing Hibiscus, be it indoors or outdoors, choosing the right potting mix plays a crucial role. You can make your own soil mix at home from a variety of ingredients, but there are also many “Ready to use” potting mixes available on the web.
Below I have explained some of the advantages and disadvantages of homemade soil mix against ready-made potting soil available online.
Advantages of homemade soil mix
- Inexpensive: One of the biggest advantages of preparing your own soil mix is that it can be less expensive than buying ready-made potting soil. Most of the ingredients needed to make potting soil at home are inexpensive or even available for free, especially if you have a garden or access to natural materials such as compost and garden soil.
- Customizable: If you make your own soil, you can adapt it to the needs of your plants. You can adjust the nutrient content, pH, and texture of the soil to meet the specific requirements of your plants. This is especially helpful if you grow not just Hibiscus but a variety of other plants that have different soil requirements.
- Environmentally friendly: Making your own soil can also be more environmentally friendly than buying ready-made potting soil. When you make your own soil, you use organic materials, such as compost, which are renewable and sustainable. Also, homemade soil is more mineral-rich than pre-packaged potting soil, which provides your plants with the nutrients essential for their long-term health.
Disadvantages of homemade soil mix
- Time-consuming: Preparing soil at home can be a time-consuming process. You need to collect all the necessary ingredients, mix them in the right proportions and ensure that the soil is free from pest infestations.
- Risk of nutrient imbalance: Unless you pay attention to the correct ratio of ingredients used, there is a risk that the soil will have an imbalance of nutrients. This can lead to problems such as stunted growth.
- Risk of contamination: With homemade soil, there is also a risk of contamination by pathogens or other harmful organisms that can cause disease to your plants. This is especially true if you use materials such as compost that have not been properly sterilized.
Advantages of ready-made potting mix
- Convenient: The biggest advantage of a ready-made potting mix is its practicality. It comes pre-mixed and ready to use, so you can start planting immediately.
- Consistent quality: Pre-made potting soil is produced under controlled conditions, which ensures consistent quality and balanced nutrition.
- Sterilized: Pre-made potting soil is usually sterilized before it is packaged, eliminating the risk of contaminants like pathogens or other harmful bacteria.
- Lightweight: Pre-made potting mix is often much lighter than homemade soil, which can be helpful if you need to place your pots on table tops or office desks.
Disadvantages of ready-made potting mix
- Cost: The cost of ready-made potting mix is much higher than homemade soil mix. This can add up if you need to repot several plants or have a large garden.
- Inconsistency: The quality of pre-made potting soil can vary from brand to brand and batch to batch, which can lead to inconsistent plant growth. Moreover, their properties can also change depending on their storage locations.
- Standard mix: Ready-to-use potting soil is usually designed as an all-purpose mix suitable for a wide variety of plants. However, Hibiscus has specific soil requirements which cannot be met by a standard mix (unless you are lucky enough to find a dedicated Hibiscus soil mix).
- Limited control over ingredients: When you use pre-made potting mix, you have limited control over the ingredients it contains. Some may contain additives that you do not want in your soil, such as chemical fertilizers or pesticides.
- Short shelf life: Pre-made potting soils can have a relatively short shelf life, especially if stored in a humid environment. This can degrade the quality of the soil mix which in turn will affect the quality of your plants.
Why home-made potting mix is best for Hibiscus?
I personally stick to homemade potting mix for my hibiscus plants because I find it to be the most effective way to ensure that they receive all of the necessary nutrients for healthy growth.
Hibiscus plants are known for their large, colorful blooms, but achieving those blooms requires a lot of attention to detail in terms of soil quality.
Plus, it’s a cost-effective and environmentally-friendly option that allows me to reuse and thus reduce waste.
As a matter of fact, homemade potting mix has been a key factor in my success as a gardener and in the health of my hibiscus plant.
But in case you are a newbie, and preparing your own potting soil seems daunting: You can check out this pre-prepared potting mix from Miracle grow for your indoor plants (Click here to buy from Amazon).
I am only recommending this in case you do not have the time or experience to prepare your own soil and would like to take a first step into Hibiscus gardening.
For everyone else, don’t you dare click on that link!
Happy gardening and lots of love ♥
Ready to multiply your hibiscus plants? My article on propagating Hibiscus from cuttings will show you how!


